Monday, July 18, 2011

colourful plants & a greenhouse....

Hi All,

I'm back again and ready to write a little bit more on this years jobs within my garden project and tell you about any current visiting wildlife. Thanks for the responses to the last post and a big thank you to Marion who Identified the picture of a butterfly which I posted as a Large Skipper, it's always nice to know what's visiting so that I can workout if certain habitats which I've tried to create are actually working or not!

Still very overwhelming is the large amount of followers from different corners of the world (literally!!) thanks for logging in and following this little bit of Somerset here in Britain it is appreciated!

So what have I been up to in the last couple of weeks? Well to be completely honest not a great deal! Unfortunately the whole family has been down with this nasty cold/cough/chest infection bug which has been doing the rounds recently, this combined with the wet weather has prevented me from doing anything too 'taxing' in the garden! The only thing that I have completed is the purchase and erection of a new greenhouse.
My thoughts on a site for the greenhouse were that it needed to be out of the way but not tucked into a corner right at the bottom of the garden, where getting to it becomes a chore. Having my workshop and tool shed near the top of the garden but along the left-hand fence line meant incorporating the greenhouse in this area was the most logical solution. This would keep all the 'working' parts of the garden (my HQ) together for easy access. To disguise the structure a little but make a bit of a feature out of it I planned to use trellis panels around it to create a contained area combined with the tools shed and of course more growing space for climbers!


Maybe not my most interesting project but in true 'Higgy' fashion here it is in pictures....


So here is the proposed site behind the tool shed and raised tropical border. As you can see this area has been a bit of a dumping ground for me and I think used to propagate horse tail weeds by the previous owners!!! 
   As with just about every project in this garden eliminating and preventing horse tail weed growth is generally at centre stage! This project was no different and after the footings were dug a layer of strong weed membrane was used before filling with the old recycled bricks from the feature rockery site.


This hardcore was smashed up with a sledge hammer and then covered with 'chippings to dust'  to create an even and level base for the greenhouse base.

I got a great 'package' deal on a greenhouse (details below) which included a 4 inch base which the greenhouse fixes down onto. I cemented this base in place to make it solid and secure. At this stage it is very important to use a spirit level to ensure that the base is level, also measure corner-corner to ensure that it is square also. Doing this will mean a nice easy and accurate fit of the greenhouse onto the base.
 I then added extra cement in the corners and levelled the ground inside the greenhouse with further 'chippings to dust'

The greenhouse is then assembled as per instructions and fixed onto the base. I then levelled and landscaped the area around the greenhouse and shed to create some space, tidy it up and make a few more planting areas! 
I used some "free to collector" breeze blocks to build a little planting pocket and landscaped behind the greenhouse with rocks which a friend was disposing of.

To allow for some pictures of flowers currently out in the garden I am going to leave this project here and write some more next time when we will put up the trellis panels and finish off.

So here we are then what's out in flower at the moment in Higgy's garden?.....

Japanese anemone
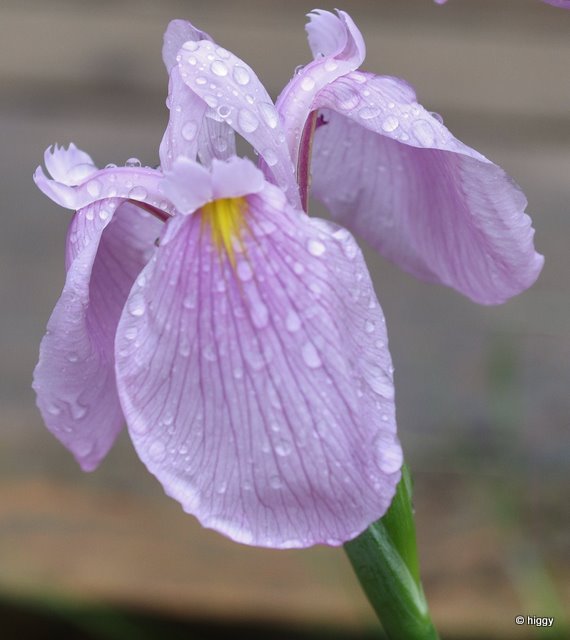
I have a vast selection of irises which I am attempting to grow near the stream/bridge areas

Lysimachia Punctata (yellow loosetrife)

Astrantia (bees love this!)

Day Lilly

Anemone (I currently have different varieties out all grown from seed)

As the hour is now getting late and I have an early start in the morning I will have to leave it there for now unfortunately. I hope to post again soon where you will see the completion of the greenhouse area, some more flowering plants and I thing a well overdue look at my feathered friends.

Many thanks for reading, I do hope that you are enjoying my scribblings and the subjects interesting and varied?....Let me know what you think?.....

Higgy


Friday, July 1, 2011

Gardening for wildlife....

Hello All,

Firstly apologies as my intentions to add more posts didn't happen last month as promised due to the amount of jobs in the garden which have needed attention and the little spare time that I get.

Despite ill health knocking me back a bit during June and my realisation that some 'heavy' jobs now need to be delayed or require assistance, I have got a little done such as, prepare an area for and erect a greenhouse, which means that I will now be able to bring on so many more plants (hooray!!), complete the feature rockery and get a few more plants in....

Before I show you the results of the feature rockery I wanted to share with you something which was on my initial 'wish list/plan' for the garden and I hope you will agree is slowly proving a success?....Number eight on my list was.....


"8. Encourage wildlife in the garden"


As usual to save space and relay more information here in pictures are the results so far of the wild-flower lawn area and the wildlife that it has attracted.....


Here are a couple of pictures looking through the wild'flower lawn area and you can see plenty of colour, including...


Corn Cockle....
Corn Marigold....
Corn Flowers and I have these in blue, white and an interesting variety which is purple almost black!

There are other flowers and plants within this meadow area but too many to list on here. If you would like to find out in more detail about these plants please to contact me and I will be more than happy to email you with further details/pictures etc...

Right then what creatures have made this area the 'in' place to be seen this year?....

Lady birds have been showing in huge numbers in the garden which is really pleasing as they will help me naturally control all the bugs!
Oedermera Nobilis (thick legged flower beetle) I had never seen one of these before this year and now have lots in this area where they particularly like to feed on the pollen of the corn marigolds
Bees and hover-flies of many different types visit regularly and I will do a feature about these at another time once I've managed to identify them all!!!
Again as with bees and hover-flies, many different species of butterfly visit and I will try and cover them all as the season goes on but here are three recent visitors... 

A Painted Lady
A Ringlet (female)
Now I would guess a Skipper of sorts, but I not sure which species....let me know if you can ID this one please?....

A couple of caterpillars which again I haven't yet identified....let me know??


Finally a (not so good) picture of a Grass Hopper. 

Obviously these are pictures of only a tiny proportion of the insects that I have been fortunate to attract to this area of the garden this year and there are just too many to include in one post. I will write further posts about specific insect types and these will include butterflies & moths, Bees & hoverflies. I'm also hopeful of attracting other wildlife into my small plot and have further projects planned to encourage just that....watch this space!!....

Finally on the wildlife front here is one of my natural slug controllers!!..... 

Meet Tommy Toad, my natural slug controller!! Here sat between the shed and the cold frame where he has been guarding my seedlings from hungry slugs and snails (good lad!!)

Well that's about it for now folks except to leave you with a picture of the feature rockery as it is now....planted and making a nice entry to the area behind the pond which is still awaiting landscaping!!...

As always many thanks for reading and following my blog. I appreciate your nice comments and always answer ALL comments sent so please keep them coming? Thanks to Thomas for his question about my colourful borders, it's nice to know that you are keen to try some of my ideas and I hope that my 'long winded' answer was ok and gives you the necessary information to have a go?

Keep the questions coming and I will look to post again really soon, including some of the plants currently flowering in Higgy's garden as a bit of a change from the hard landscaping.

Cheers

Higgy


Tuesday, June 7, 2011

Feature Rockery and my compost mix

Hello All,

As promised on my last posting I am writing this shortly afterwards to keep you all up to date of the current work on the feature rockery. This project is proving to be quite time consuming so my intention is to post a little on it a bit more often to try and cover it in as much detail as possible for you.

The area of the garden that I am currently working on is situated to the side of the pond and borders the sun patio where we often sit and eat outside. Getting this area right is important as it is central to the garden and seen in detail by visitors who will sit here with a cup of tea (always a brew going for friends at Higgy's!!)

As you would have seen in my last post the area was cleared following the erection of my new fence and I had already knocked down a retaining wall and dug away soil to create terracing ready for underlay and rocks. The reason why I am doing the groundwork like this is that we have a terrible problem with horsetail weed which having not been managed for many years has invaded the whole garden. For those of you who have never had the pleasure of this weed let's just say it's a nightmare and almost impossible to eradicate. My theory is to dig out as much of the soil (and therefore weed) as possible lay a weed membrane and back fill with new compost/soil. Incidentally my current compost mix which I have found really good and consistent is as follows:
1 x bag of Wickes 'top soil' (currently 5 x 25ltr bags for £13)
1 x bag of Wickes 'peat free compost' (currently 4 x 60ltr bags for £13)
half bag of Wickes 'multi purpose compost' (currently 4 x 75ltr bags for £13)
Wickes compost can be found here: http://www.wickes.co.uk/tools-compost+accessories/compost-turf+bark/icat/gdncompost/

Obviously if you were back filling a large area then this method would be very expensive so for more general bulk filling I use Dandy's compost  http://www.dandystopsoil.co.uk/?gclid=CJrxvo-lo6kCFQNP4QodhErpuA but have found that this is very soil based and therefore not so good for growing on young plants etc.

This week I have done a little more to the rockery and as usual will guide you through it with photographs so that you can watch this area develop:

The retaining wall has now gone to create more space and the soil (and weeds) have been dug out. I have 'terraced' the remaining soil to give firm areas for the rocks to sit and to create planting troughs.

Strong weed membrane was laid over this terracing ensuring that each piece overlapped the next by a substantial amount. My compost mix was then shovelled on to create a nice bank of quality soil.

My "free to collector" rocks were then put into place on the terraced parts of this feature and further soil mix added to part bury the rocks and give a natural look and add further depth of compost to the planting areas. (Note that I have a large amount of membrane left this is worth doing as when the weight of the soil and rocks push and crease it down into the planting troughs it will be pulled into the feature, if you cut it to size it will become too short when the soil is added)

I have included steps which will give you access to the large area above the rockery tying it together. (You can see that even here the membrane is overlapped to prevent ingress from weeds) 

Here's my quick and easy way to making steps; once the ground has been prepared place an old breeze block on each step, fix a board (screwed and raw plugged in this case) onto the front of each block and then back fill with concrete and.....you have an instant step!! (these breeze blocks were also "free to collector"!)

I then followed the same process on the other side of the steps...

Once soil and rocks are in place the remaining membrane can be carefully trimmed off. I then added blue slate gravel to the area between the patio and lowest rocks to finish it off, this gravel will also run along the paths in the area above. I threw this gravel on top of the steps whilst the concrete was still wet so it also runs down the steps once again this should add continuity to the different areas. 

That is about as far as I have got with this project so far and as you can see from this picture I'm not quite finished as I have now run out of rocks! The good news that some very good friends of mine have now offered me some rocks which are perfect for finishing this job! (thanks Mark & Claire!)

As I now plan to try and add a few more regular posts I will update you on the other things which I promised to tell you about in my next post....

As always thanks for following Higgy's Garden Project and I hope to get more of your comments and questions which I enjoy so much?????....

Higgy 


Saturday, May 28, 2011

Spring into Summer....

Hello All,

Welcome to another round of tales from Higgy's garden. Apologies that it has been a while since I last posted but it has been such a busy time in the garden with ongoing projects to finish, new projects beginning and of course lots and lots of seeds to sow and seedlings to look after! This dry spell has also meant lots of watering and trying to catch as much as possible from the little rain that we have had....

I also found out that I will be requiring a new hip at some point and have recently been suffering quite a bit of pain and discomfort due to it. Don't worry I won't let this stop me gardening but I now have to slow down a bit and learn that there are some things I can't do or will require a hand with!......Very frustrating!!!

As always a big thank you for your continued support and lovely comments that I have received, to know that some of you have been inspired by my scribblings on here is a real privilege for me to say the least! Please do keep your comments coming they are appreciated and always answered.

Right then where do I start?.....Following on from my last post here is a picture of the raised beds a few weeks on from the last time you seen them....

As you can see the raised beds are now filling up quite nicely and our peas already have pods on! 

I also left you last month with a picture of an untouched area of the garden next to the new Koi pond. this area was completely overgrown with weeds and brambles and of course an old collapsed fence which I have since found out was about 40yrs old (no wonder it was knackered!!) Wow, what a job that was clearing out this old fence which had been completely overgrown by a massive honeysuckle, ivy and of course the brambles, it took with the help of my neighbour a whole day to clear an area big enough to put up two fence panels!.....

It took two of us a whole day to get to this stage!!

Two whole days.....

And finally on the third day.....
Now we weren't expecting it to be so difficult to erect six fence panels but with tree roots, old fence posts and concrete to dig out this turned into a nightmare job!

With the panels now up the job of digging out and landscaping can begin!....

You cans see here that the old retaining brick wall has been knocked down and I have started to dig away the soil to widen the seating area and build a feature rockery....

Unfortunately that is as far as I have got with this area which is proving to be quite a tough project requiring a massive amount of work and hard graft! (The fence panels were ordered from http://www.wickes.co.uk/featheredge-fence-panel/invt/209392/ after my usual supplier couldn't deliver on time. I'm not sure if these are the cheapest prices you will find but I have to say that my experience was very good with good quality panels and next day delivery which included a phone call from the delivery driver to let me know what time they were arriving!) My plan is to widen the seating area and border it with a feature rockery using some large rocks which I have acquired from a "Free to collector" add in the local paper. This rockery will be the entrance and step you up to a more jungley/tropical area running along side the pond where I intend to use raised wooden walk ways!....Watch this space for more on this project in my next few posts.

A quick photograph overview of other jobs completed during this busy spring period.....

A raised 'trellis' bed built from reclaimed wood planted with clematis and honeysuckles

'Some' of the seedlings which I have grown this year!

The wild flower meadow is growing with some flowers coming through however I am currently adding home grown plugs to increase this years flowers, Paths have been mown into the grass....

Free reclaimed rocks for feature rockery collected (with a little help!!)

Last post I also promised to show you my use of an old redundant builders wheelbarrow in my shade garden.....

The wheelbarrow was painted green with some hole punched in the bottom for drainage, part buried at the back of the border filled with compost and planted with ferns and heucheras....

A few old part buried pots add to the planting and make a nice simple feature for a shady area.

That's about it for this post except to leave you with some pictures of this months feathered (and fluffy) visitors to Higgy's garden.....

Gold Finches have made a welcome return

A cheeky chappy on my feeders

True summer visitors return...House Martins
(too fast to photograph!!!)


That's it folks, until next time.....

Next Time: More from the feature rockery project, 'I need a greenhouse' and wildlife paths come to life...

(As always please keep loggong in and sending me your comments.....I want to hear from you!!!)

Cheers

Higgy