
What a busy couple of months it has been and I've hardly seemed to have the time to get on the computer let alone write another post on here! I have so much to write about and plenty of pictures that I think I could write half a dozen posts and probably still not bring you up to date!
With the ever increasing numbers of visitors we are getting to this blog I have felt under pressure to get something written again but I have so much to do outside! I am so grateful for all your support and as ever look forward to further correspondence with some of you via the comments and emails which I am sent, please do keep them coming as I am enjoying the banter and will always reply and help if I can.
Right then where do I start!...
Well to finish off the last post would probably be as good a place as any.... here are a few photos of the greenhouse project now, It's still not completely finished but is in place and functioning in as much as I have some tomatoes growing in it currently!
I used some of my 'free to collector' breeze blocks and paving slabs to make planting and standing places inside of the greenhouse.

Once the greenhouse was up I used trellis panels between 3x3 fence posts to screen it and make a feature out of it. The arch way through connects it to the tropical raised bed and gives access to the 'working' area created between the greenhouse and tool shed. The trellis has already been planted with three different varieties of honeysuckles so next year this should soften it's appearance and create a nice fragrant area to work in.

Right that's the greenhouse done so the question is what did I move onto next?....
Well I've had so much interest about the development of the area behind the pond I felt obliged to start this!! I am just going to remind you of how it did look and then once I have brought you up to speed on my feathered visitors I will show you the start of this project.
So here is the space behind the pond in need of development....

Right then here are my recent feathered visitors....
As always the fields and garden are filled with gulls looking for a free meal!!...

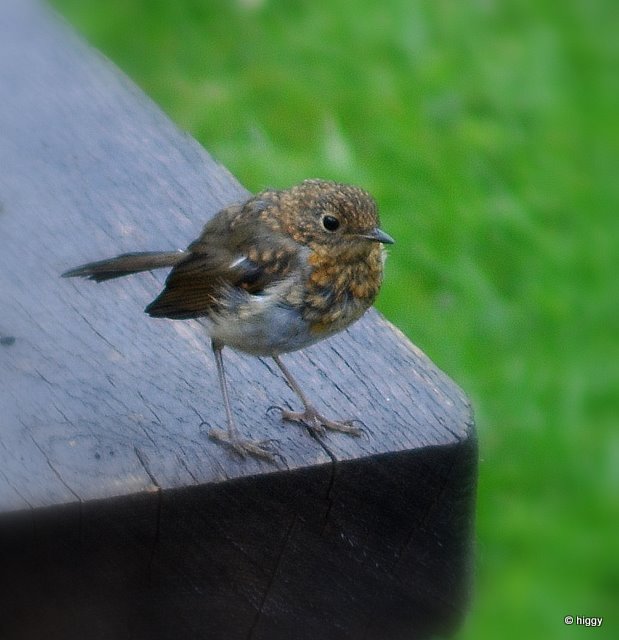
My new Robin fledgling who greedily watched me unearthing worms whilst developing the area behind the pond where it found plenty of juicy morsels to feast on...
Not the greatest picture but taken at some distance, this kestrel and it's family nest nearby and can often be seen hunting across our field and hedgerow over the last couple of weeks I have watched the adult bird teaching the young to hunt before they finally fledge .

SPARROWS!!!...well my little flock of about a dozen has now grown to in excess of 30 birds! They are polishing off a full large seed feeder a day! Here's a few of them squabbling for the seeds!!

A young female sparrow taken some time out from the fun...

Now I have been privileged to have a family of Buzzards in the trees a few fields away from our garden, they can often be seen hunting along the hedge line at the bottom of the garden and out across the fields. So far I've been unable to get a 'good' shot in the garden but here is one of (HARRY!) flying low across the paddock....

I have much more to post in the form of garden visitors such as butterflies and insects but these will have to wait until next time!
So here we are then the moment which many of you have been waiting for the start of the area behind the pond! My initial thoughts were to go for a tropical feel with raised deck walkways but on reflection I didn't feel the space could quite carry it off. Having used plum slate around the new feature rockery I thought the use of it for a pathing material would tie everything together and give some continuity to the designs despite their differences. I have planned to use raised beds and this hasn't changed other than the type of material used which has changed from sleepers to bark edged boards, which came from here: http://www.fountaintimber.co.uk/gate-posts-sawn-timber/treated-gate-posts-and-sawn-timber/waney-edge-board.html
As always here it is in pictures....
So just to remind you here is the area and the steps which I built as part of the feature rockery, which take you up behind the pond....

As you can see from both this and the above picture, I have had to dig out a good amount of soil to get the levels correct and deal with the Horse tail and bind weed which were deep rooted here...

As the design was quite fluid on this project I worked a small area at a time and worked from the front into the plot which really helped me see and feel where I wanted the features go. This was a difficult design as the space is quite small so a 'little as you go' strategy seemed the best solution, by adopting this approach anything which felt wrong was easily corrected without changing large amounts of work and effort!

Due to the horrendous Horse tail weed and the added nuisance of bindweed I again used weed control membrane following digging to help keep it at bay or at least make it manageable.

The feature path was then marked out using round posts which the boards would eventually be fixed to and create a series of raised beds...By fixing in the bottom board I was able to use the plum slate to help me visualise the flow of the path and therefore the placement of the next posts....

With the posts sunk deep into the ground with my trusty sledge hammer I was then able to screw the boards onto the posts using good quality exterior timber screws. As well as the boards being screwed into the post they were also screwed into each other where possible to give plenty of strength and rigidity to the beds.

That is about as far as I will go with this project for now as it seems a good place to break from it. I will continue with this next time where I will tell you the compost mix I use to fill the beds, show you the planting ideas for this area and the beds and of course reinstate and finish the rockery at the front. This area has been quite a challenge to work and design as it is really a dead space which goes no where. I have had to make up some of the design as I have gone along which has been interesting. As this area has thrown up a lot of interest amongst many of you I would be keen to hear your views on how I have done so far? Please feel free to comment and send me a message and comment which I will answer and maybe discuss on my next posting!!
As always thanks for reading I do hope that you are all still finding my garden ramblings interesting and enjoying my little piece of Somerset as much as I am!?
Just before I go I couldn't not show you my 4yr old's new garden HQ where she proudly keeps all her gardening tools so they are at the ready for 'helping' me out....(I'm sure child friendly and interest was on my original wish list!!!)

Cheers
Higgy